Let’s say you want to create a Qualtrics survey where you assign respondents to groups, and you want to display certain images depending on their group assignment. For example, if they’re assigned to Group 1 you want a question item to display one set of images, while a different set will be shown to Group 2. Qualtrics doesn’t offer a built-in way to do this. However, it does provide the ability to use custom Javascript and CSS, which we can use to display images conditionally.
You can see this in action here.
The steps are fairly straightforward:
- In the question item, add both sets of images using the Qualtrics UI
- Add a HTML class to each of the images
- Use JavaScript to retrieve the assigned group
- Use CSS to hide one set of images based on the assigned HTML class
Qualtrics Setup
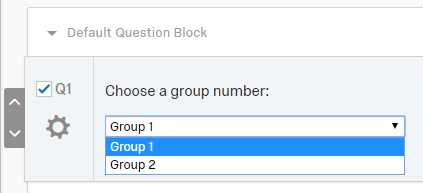
The first thing we need to do is assign respondents to a particular group. This can be achieved in a number of ways (assign embedded data value using a query string, use the Survey Flow Randomizer to assign an embedded data value etc.). For this example, I’ll just use a simple Multiple Choice question where group number can be assigned manually:
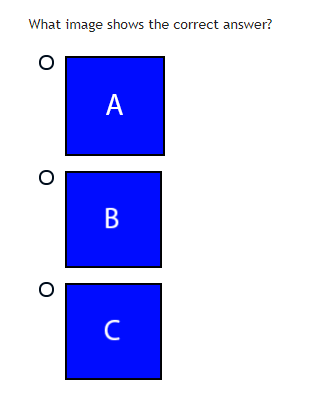
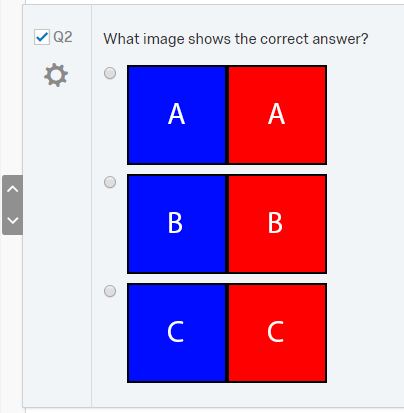
Next, we need to create a question item where the images will be displayed. Here I just created a simple Multiple Choice question where the images act as the response options (although this technique can be used anywhere you can display an image). The goal is to have only the blue images displayed if the respondent has been assigned to Group 1, and only the red images displayed for Group 2.
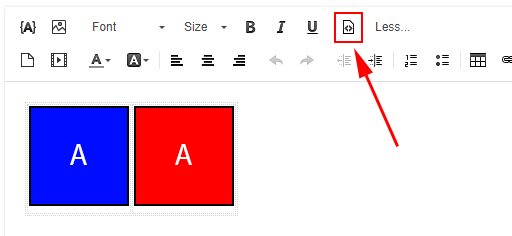
Note that both sets of images should be added here (side-by-side). You can add images as responses by clicking the response option and using the Rich Content Editor. I also created a 1×2 table to house the 2 images, but that’s optional:
Add HTML classes
We need to assign a class to each of the 6 images. You can think of a class as a label. By labeling each image, we can later use JavaScript and CSS to hide images belonging to a specific class. To do this, open the Rich Content Editor for a response option and click the Source button:
You’ll see HTML code that looks something like this:
<table border="0" cellpadding="1" cellspacing="1" style="width:200px;">
    <tbody>
        <tr>
            <td><img src="https://link_to_image1" style="width: 100px; height: 100px;" /></td>
            <td><img src="https://link_to_image2" style="width: 100px; height: 100px;" /></td>
        </tr>
    </tbody>
</table>
In this example I used a table for layout, but the key is to identify the <img> tags that display the 2 images. In the code above, they are:
<img src="https://link_to_image1" style="width: 100px; height: 100px;" />
and
<img src="https://link_to_image2" style="width: 100px; height: 100px;" />
We need to add a different HTML class to each of these tags so we can differentiate the images later. You can call the classes whatever you want, but in my case I assigned g1 to the left image and g2 to the right image:
<table border="0" cellpadding="1" cellspacing="1" style="width:200px;">
    <tbody>
        <tr>
            <td><img class="g1" src="https://link_to_image1" style="width: 100px; height: 100px;" /></td>
            <td><img class="g2" src="https://link_to_image2" style="width: 100px; height: 100px;" /></td>
        </tr>
    </tbody>
</table>
We will use these classes later to hide the image we don’t want. For example, if the respondent has been assigned to Group 1, we will hide all images that belong to the class g2.
Hide images using Javascript and CSS
Finally, we use JavaScript to retrieve the group assignment and hide images we don’t want to display to that group.
Click the cog icon for the question and Add JavaScript:
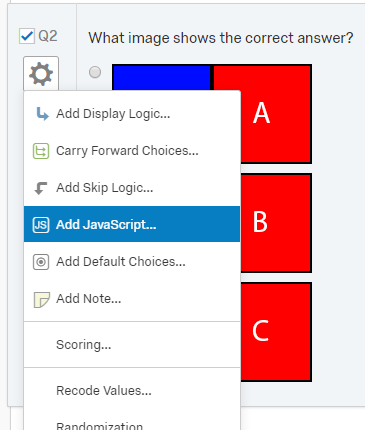
You’ll see some JavaScript callbacks. We’re interested in addOnload(), which is where we place code that we want to be executed when the page loads:
Qualtrics.SurveyEngine.addOnload(function()
{
	/*Place your JavaScript here to run when the page loads*/
});

Qualtrics.SurveyEngine.addOnReady(function()
{
	/*Place your JavaScript here to run when the page is fully displayed*/
});

Qualtrics.SurveyEngine.addOnUnload(function()
{
	/*Place your JavaScript here to run when the page is unloaded*/
});
Change the code to the following:
Qualtrics.SurveyEngine.addOnload(function()
{
	/*Place your JavaScript here to run when the page loads*/

	var group = "${q://QID1/ChoiceGroup/SelectedChoices}";

	if(group == "Group 1"){
		jQuery("#" + this.questionId + " .g2").css({"display": "none"});
	} else if (group == "Group 2"){
		jQuery("#" + this.questionId + " .g1").css({"display": "none"});
	}

});

Qualtrics.SurveyEngine.addOnReady(function()
{
	/*Place your JavaScript here to run when the page is fully displayed*/

});

Qualtrics.SurveyEngine.addOnUnload(function()
{
	/*Place your JavaScript here to run when the page is unloaded*/

});
In the code above:
- We get the selected response from our first question, which is the group assignment, and store that into a variable called
group - Next we have an
ifstatement that checks whether thegroupvariable is equal to “Group 1”- If so, we use jQuery to select everything (in the current question) that has a HTML class of
g2, and use CSS to set its display value tonone - This is basically checking whether the respondent is in Group 1, if they are then we hide all images that have the
g2HTML class, effectively hiding the images that shouldn’t be shown to this group
- If so, we use jQuery to select everything (in the current question) that has a HTML class of
- We then use an
else ifstatement to check for assignment to Group 2 and hide theg1images
When respondents are filling out the survey, they will now only see one set of images. For example, if they are in Group 1 they will only see the blue response images: